Hup crane wont fold to weathervane

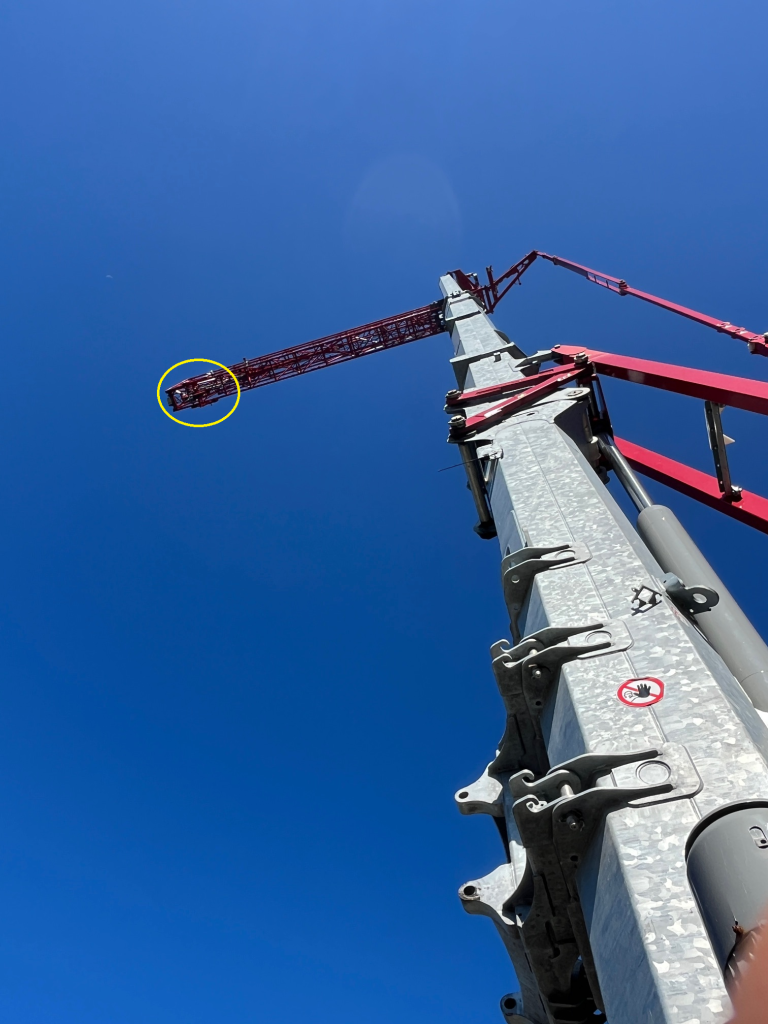
After service and teach-in of a Hup 32-27 The jib was required to be folded for weathervane. Went through the book to confirm the steps were completed in order and done correctly. 

The crane would fold the jib tip but not the complete jib. A red x would appear when weathervane target was selected.

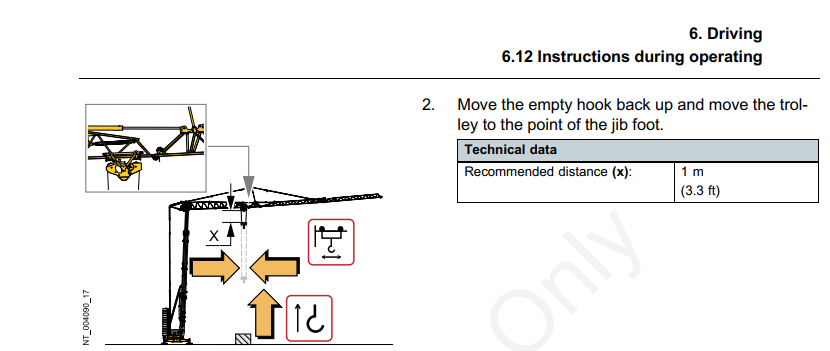
The image for the Trolley position if glanced at quickly is difficult to decern the correct trolley placement. Folded Jib trolley placementNote: The trolley must not be in the transport position.

Trolley in, until the trolley is completely inside the first jib section. This will allow the jib to fold for weathervane.

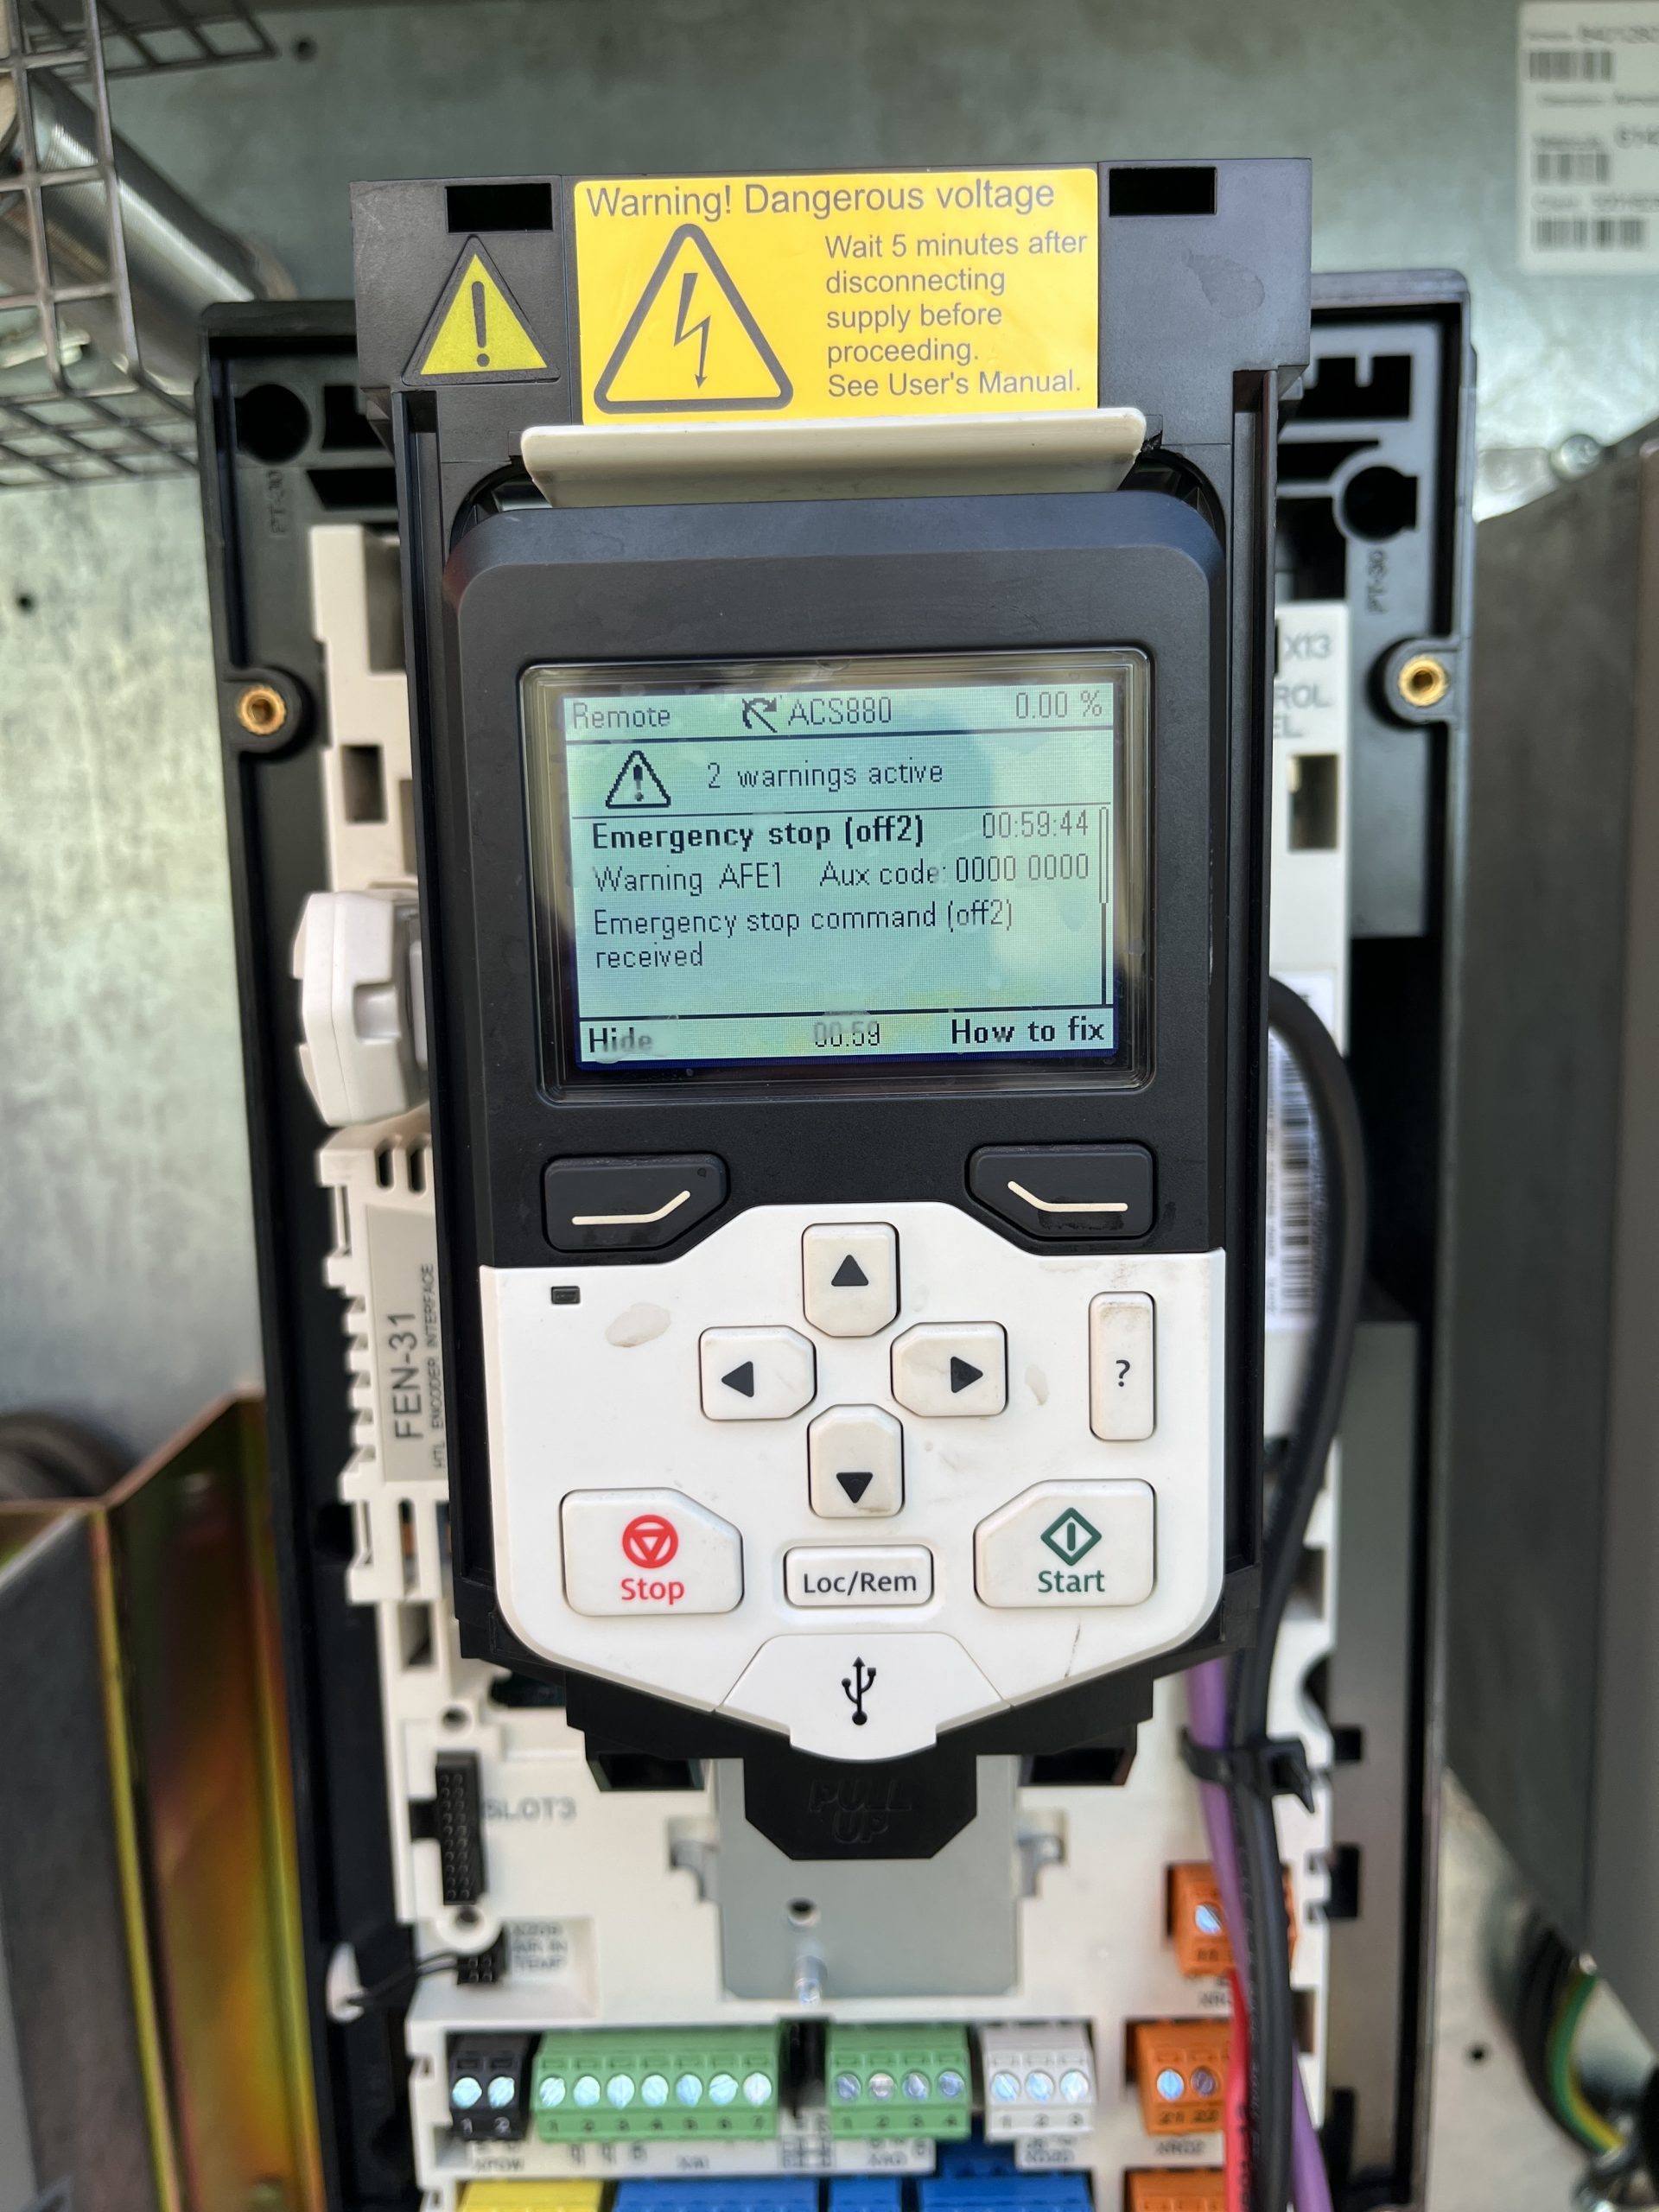
Crane lost slew function AFE1 Code on slew drive

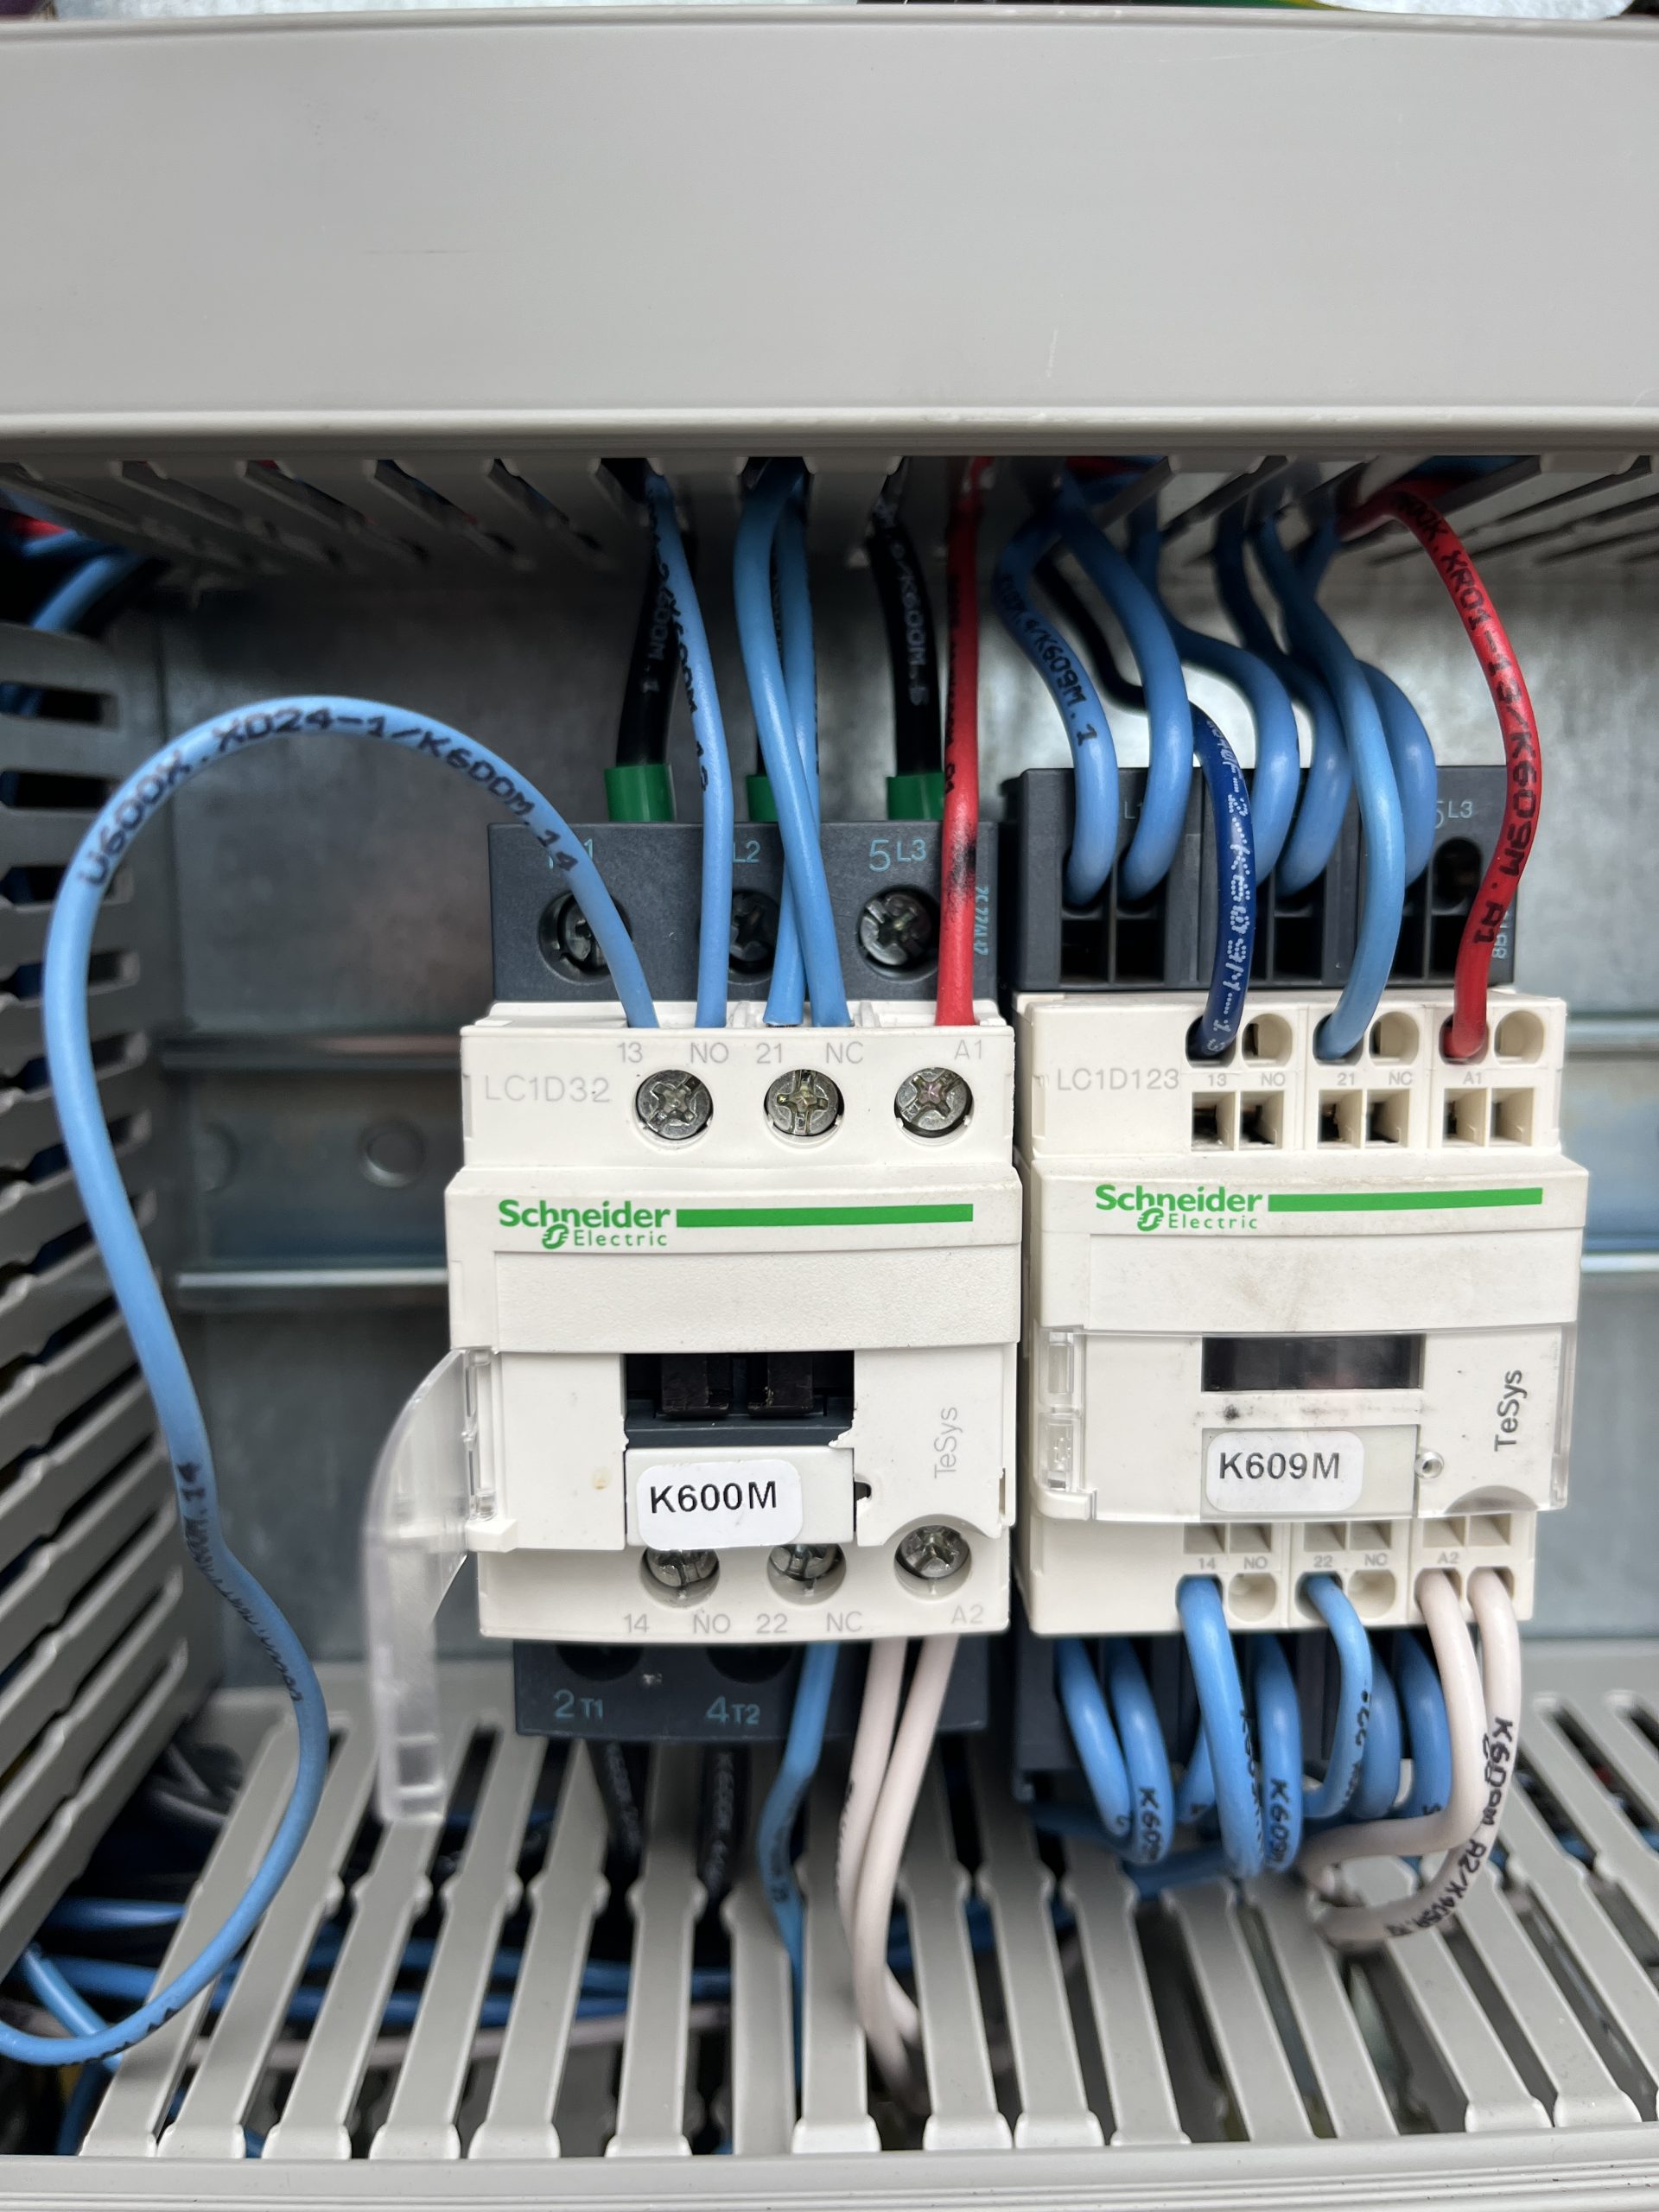
Crane lost slew function. AFE1 displayed permanently on screen. If cleared, drive would shut down. Checked voltage at XD24-2 24V connection on slew drive. Voltage was present but not 24V. Checked XD24-1 connection at slew drive Voltage was present but not 24V. Removed the XD24-2 wire are rechecked and voltage was 24V. Determined K600M Contactor was faulty.
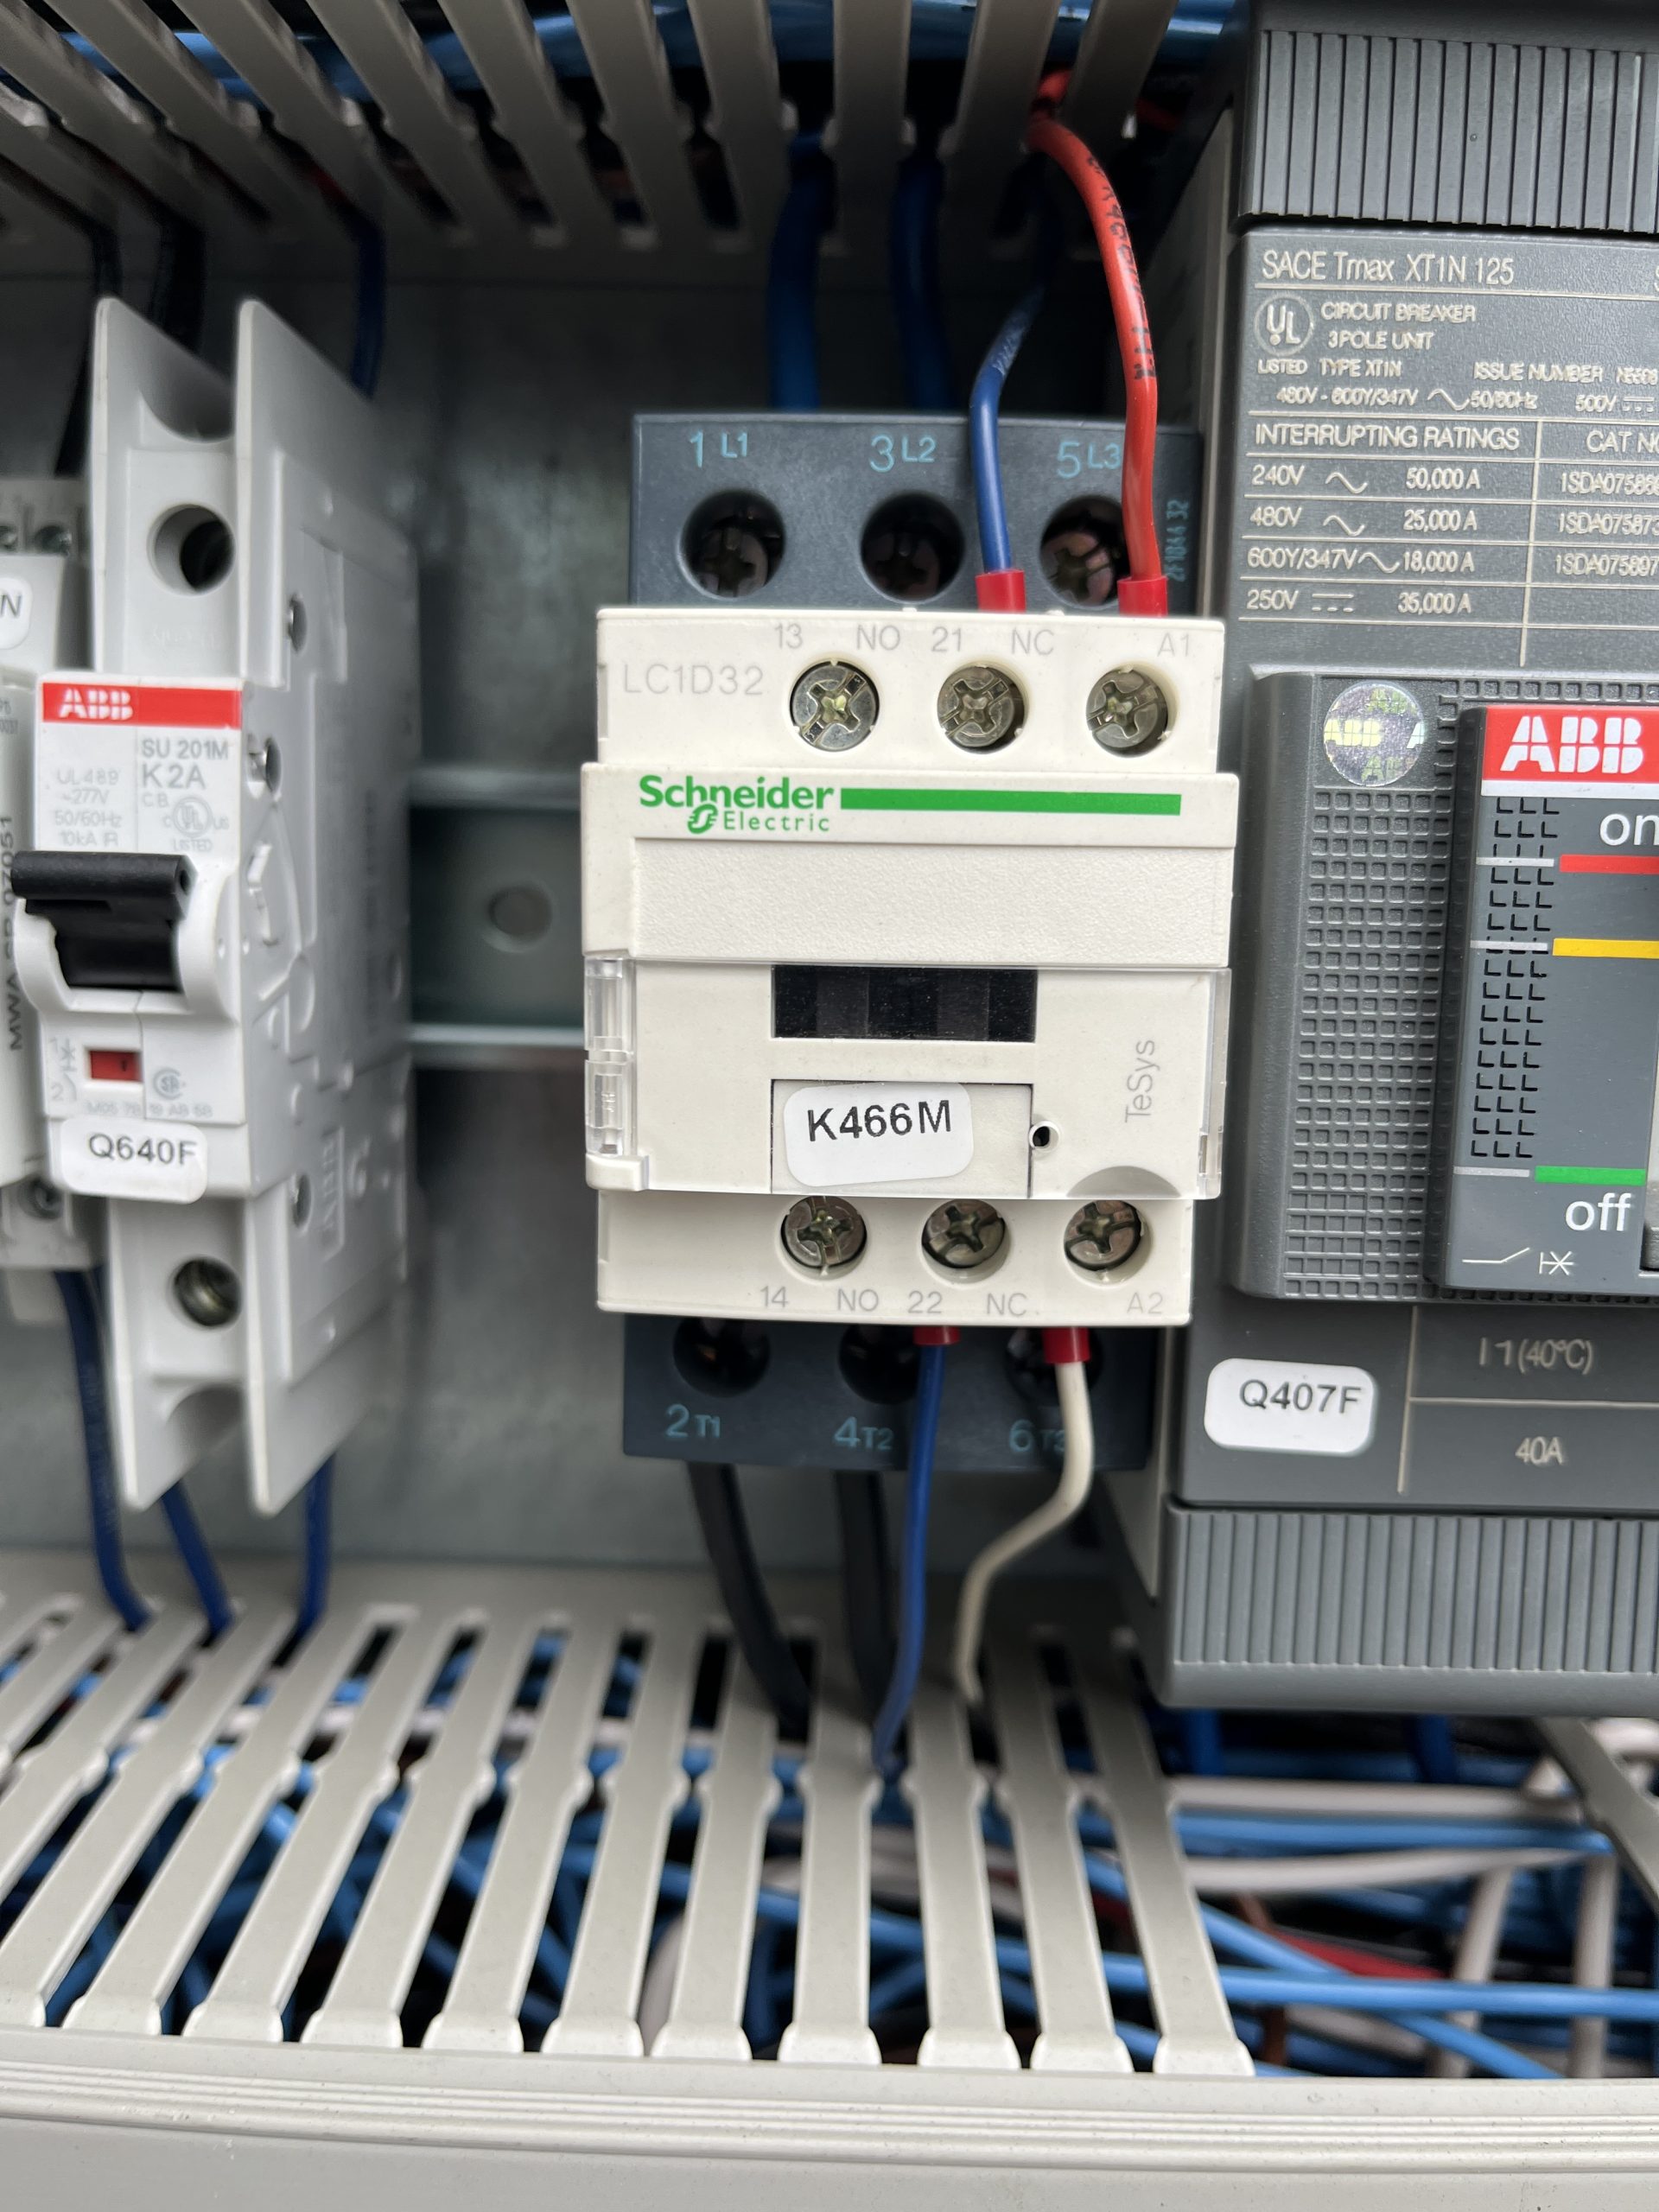
If a new contactor isn’t available. K466M (motor preheat contactor) is the same and doesn’t use the 13/14 connections. This a great contactor to use to get the crane up and running.

Removing outer jib, 104ft IgoT85

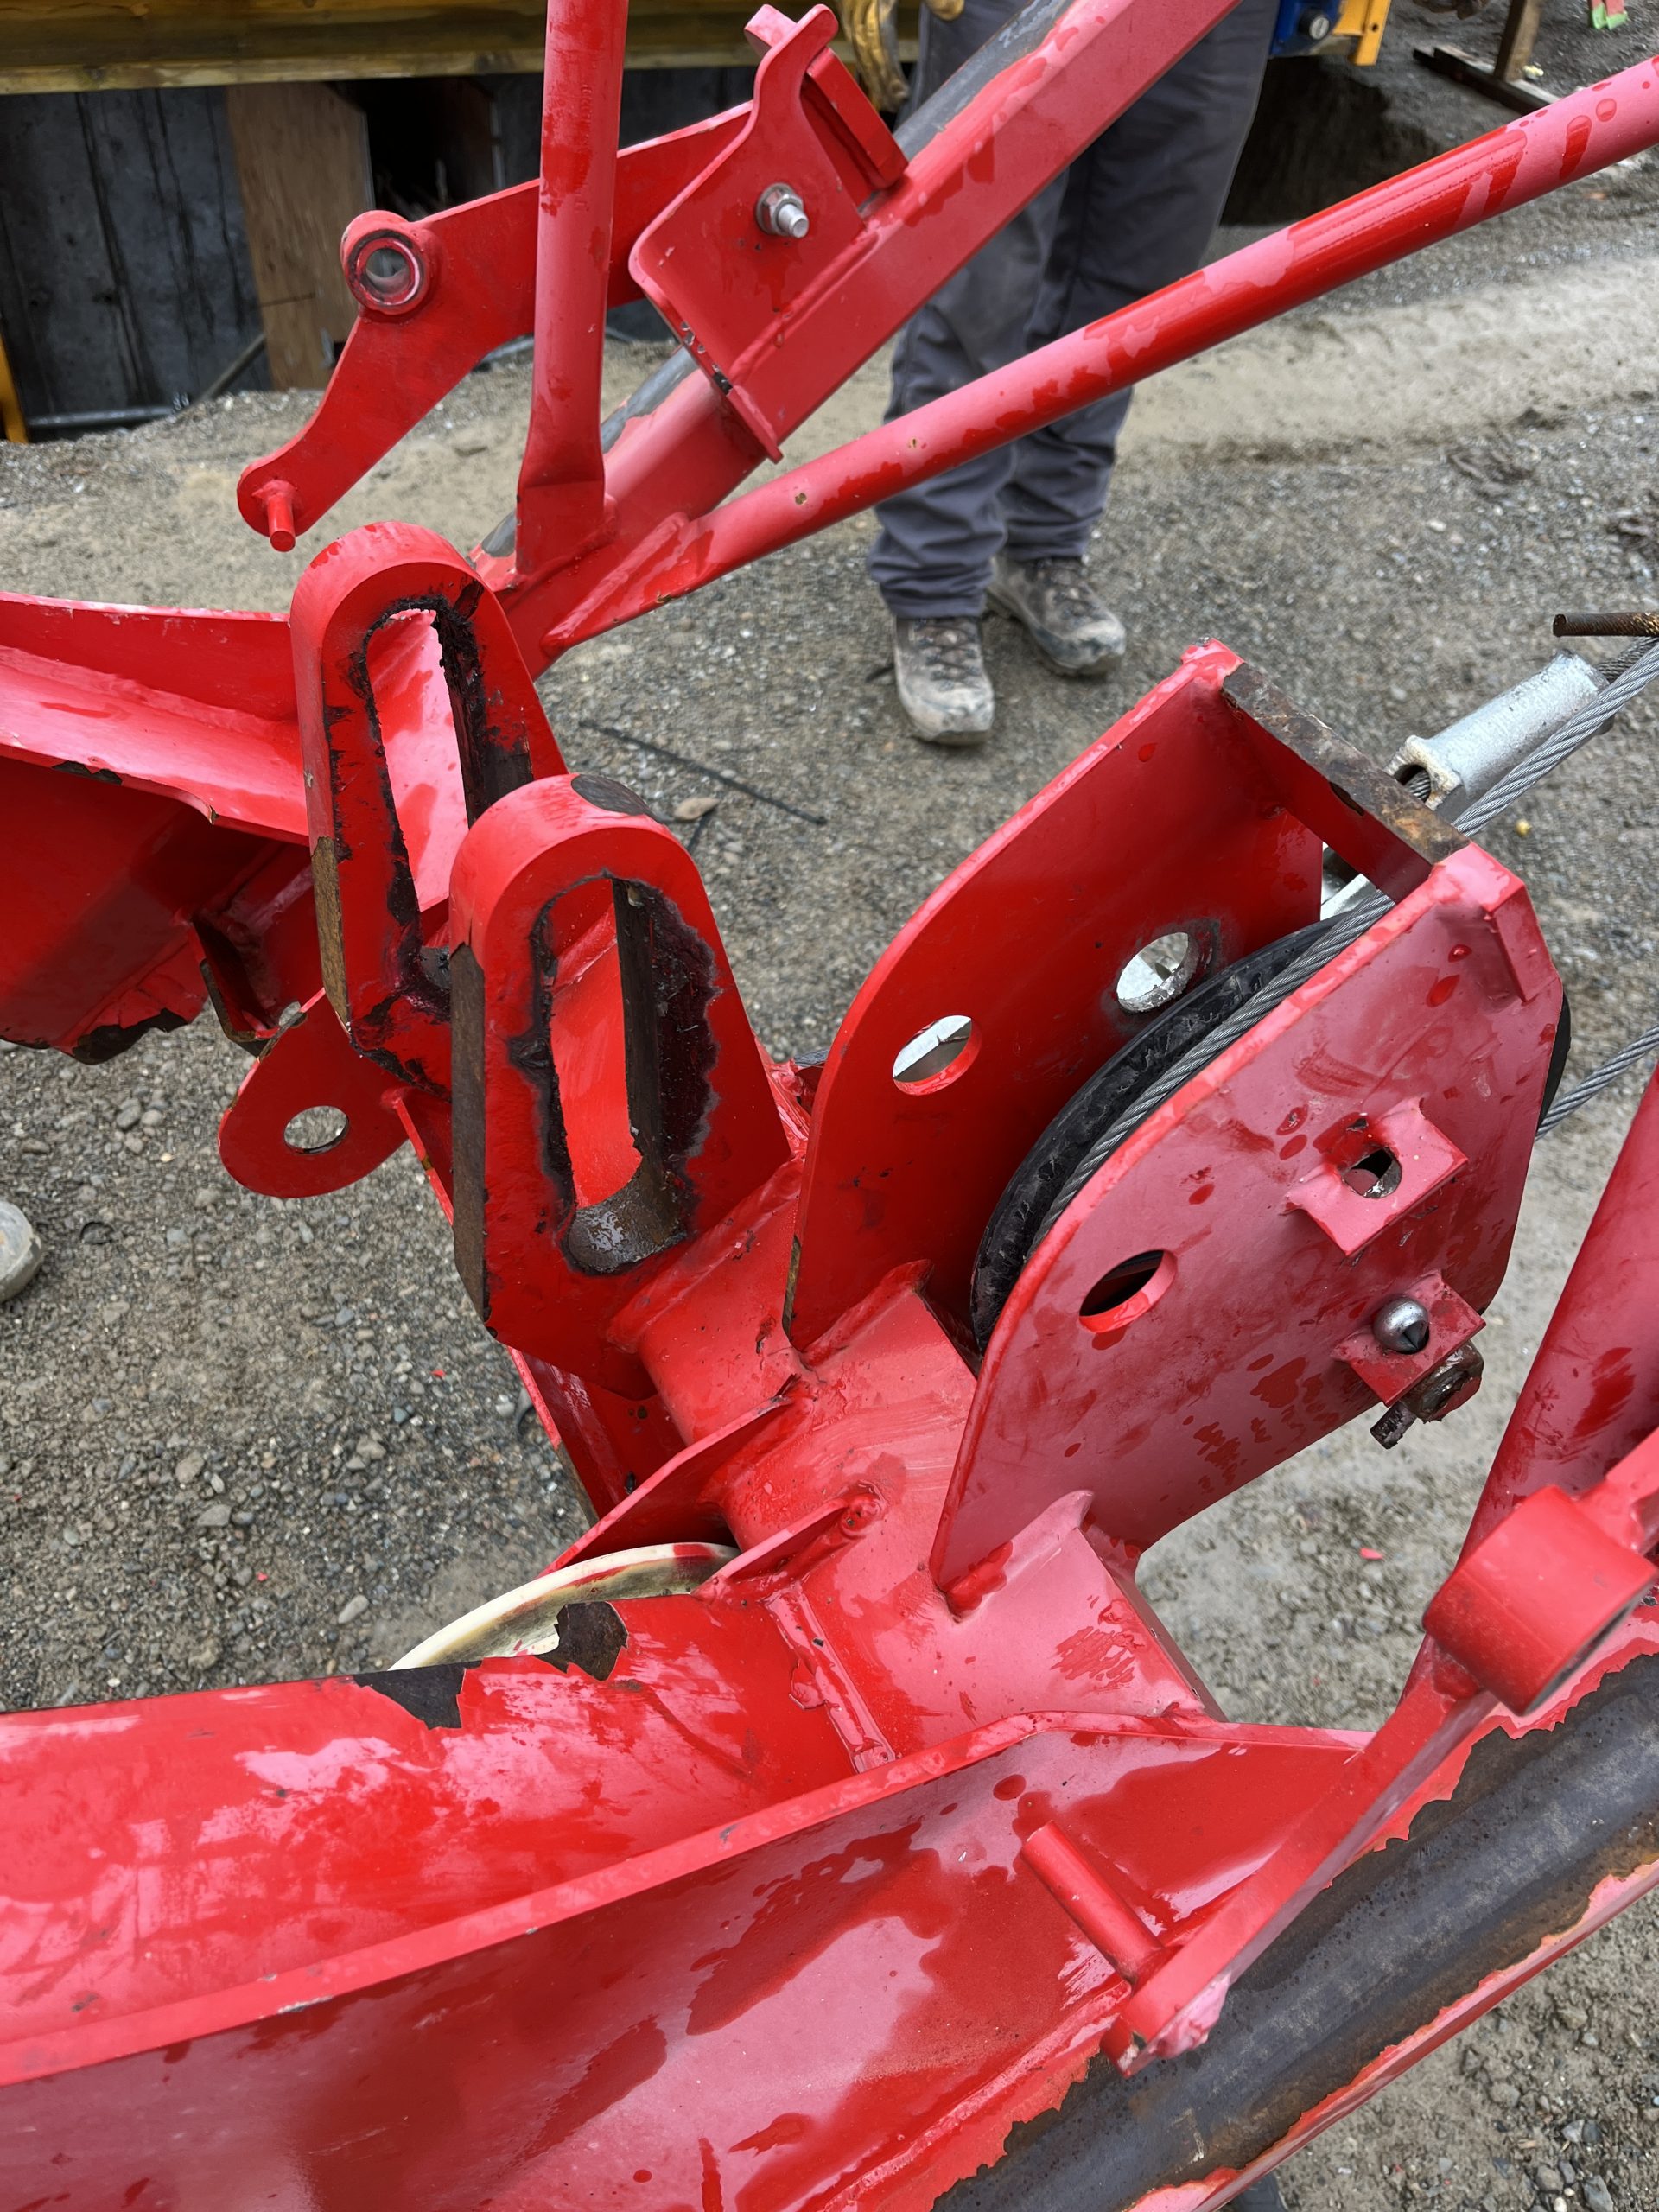
After you bring the crane into maintenance mode and get it in the position to start taking the Hydraulic cylinder,  jib attachments, and jib off.  The operator manual disassembly instructions do not match the actual process to remove the outer jib.

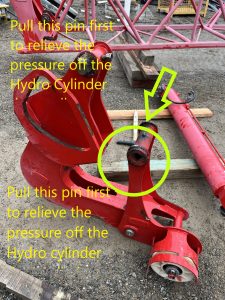
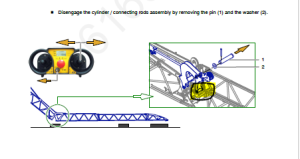
With the pictures above the picture from the manual tells you to pull this pin to get the cylinder off.  Which there is to much pressure on the cylinder to get that pin out with out possibly bending the Jib on the crane. When you get to this step of taking the Hydraulic Cylinder off you will want to revert to the edited picture above and pull that pin first.

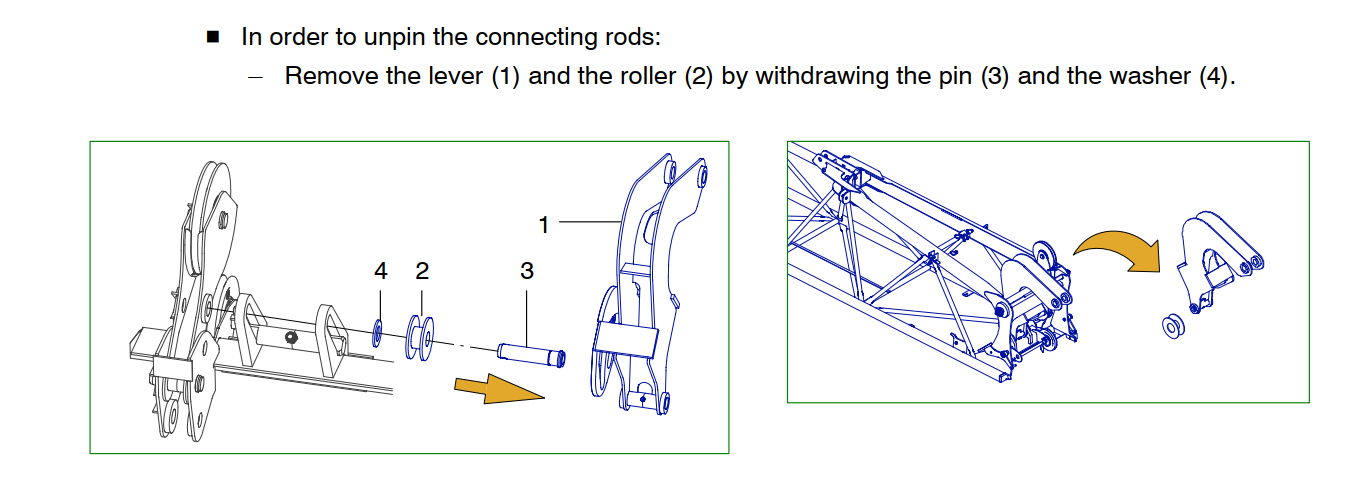
The operator manual disassembly instructions do not match the actual process to remove the outer jib. When removing the outer connecting rod/hydraulic assembly, there is no need to remove the pulley pin and roller assembly as detailed in this step.

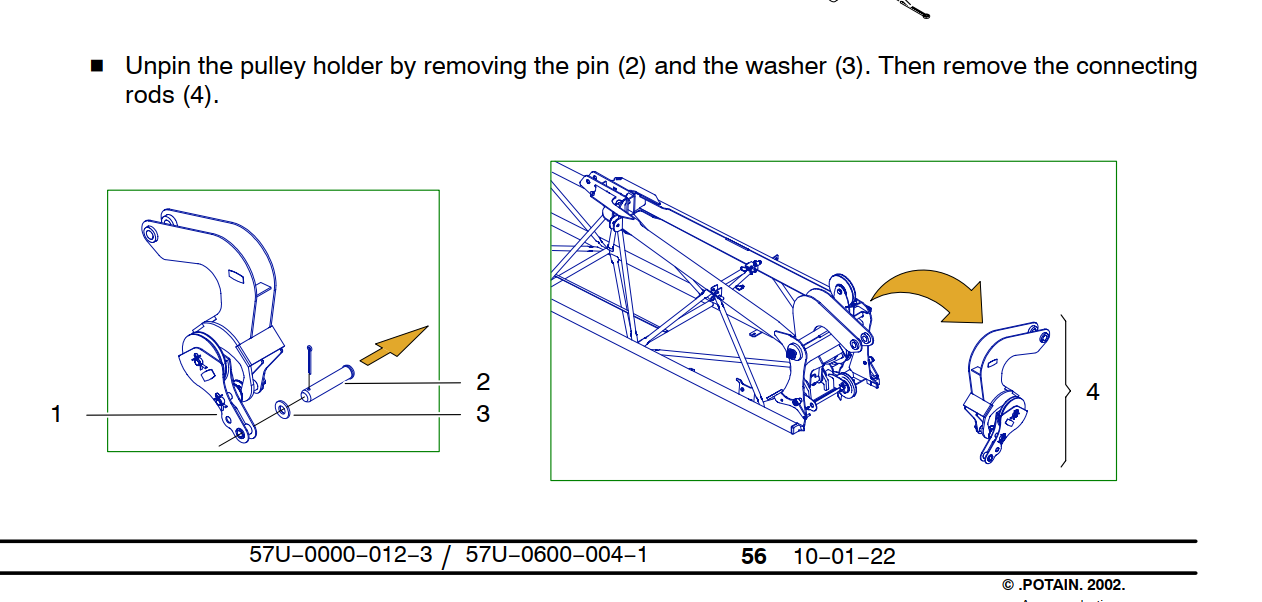
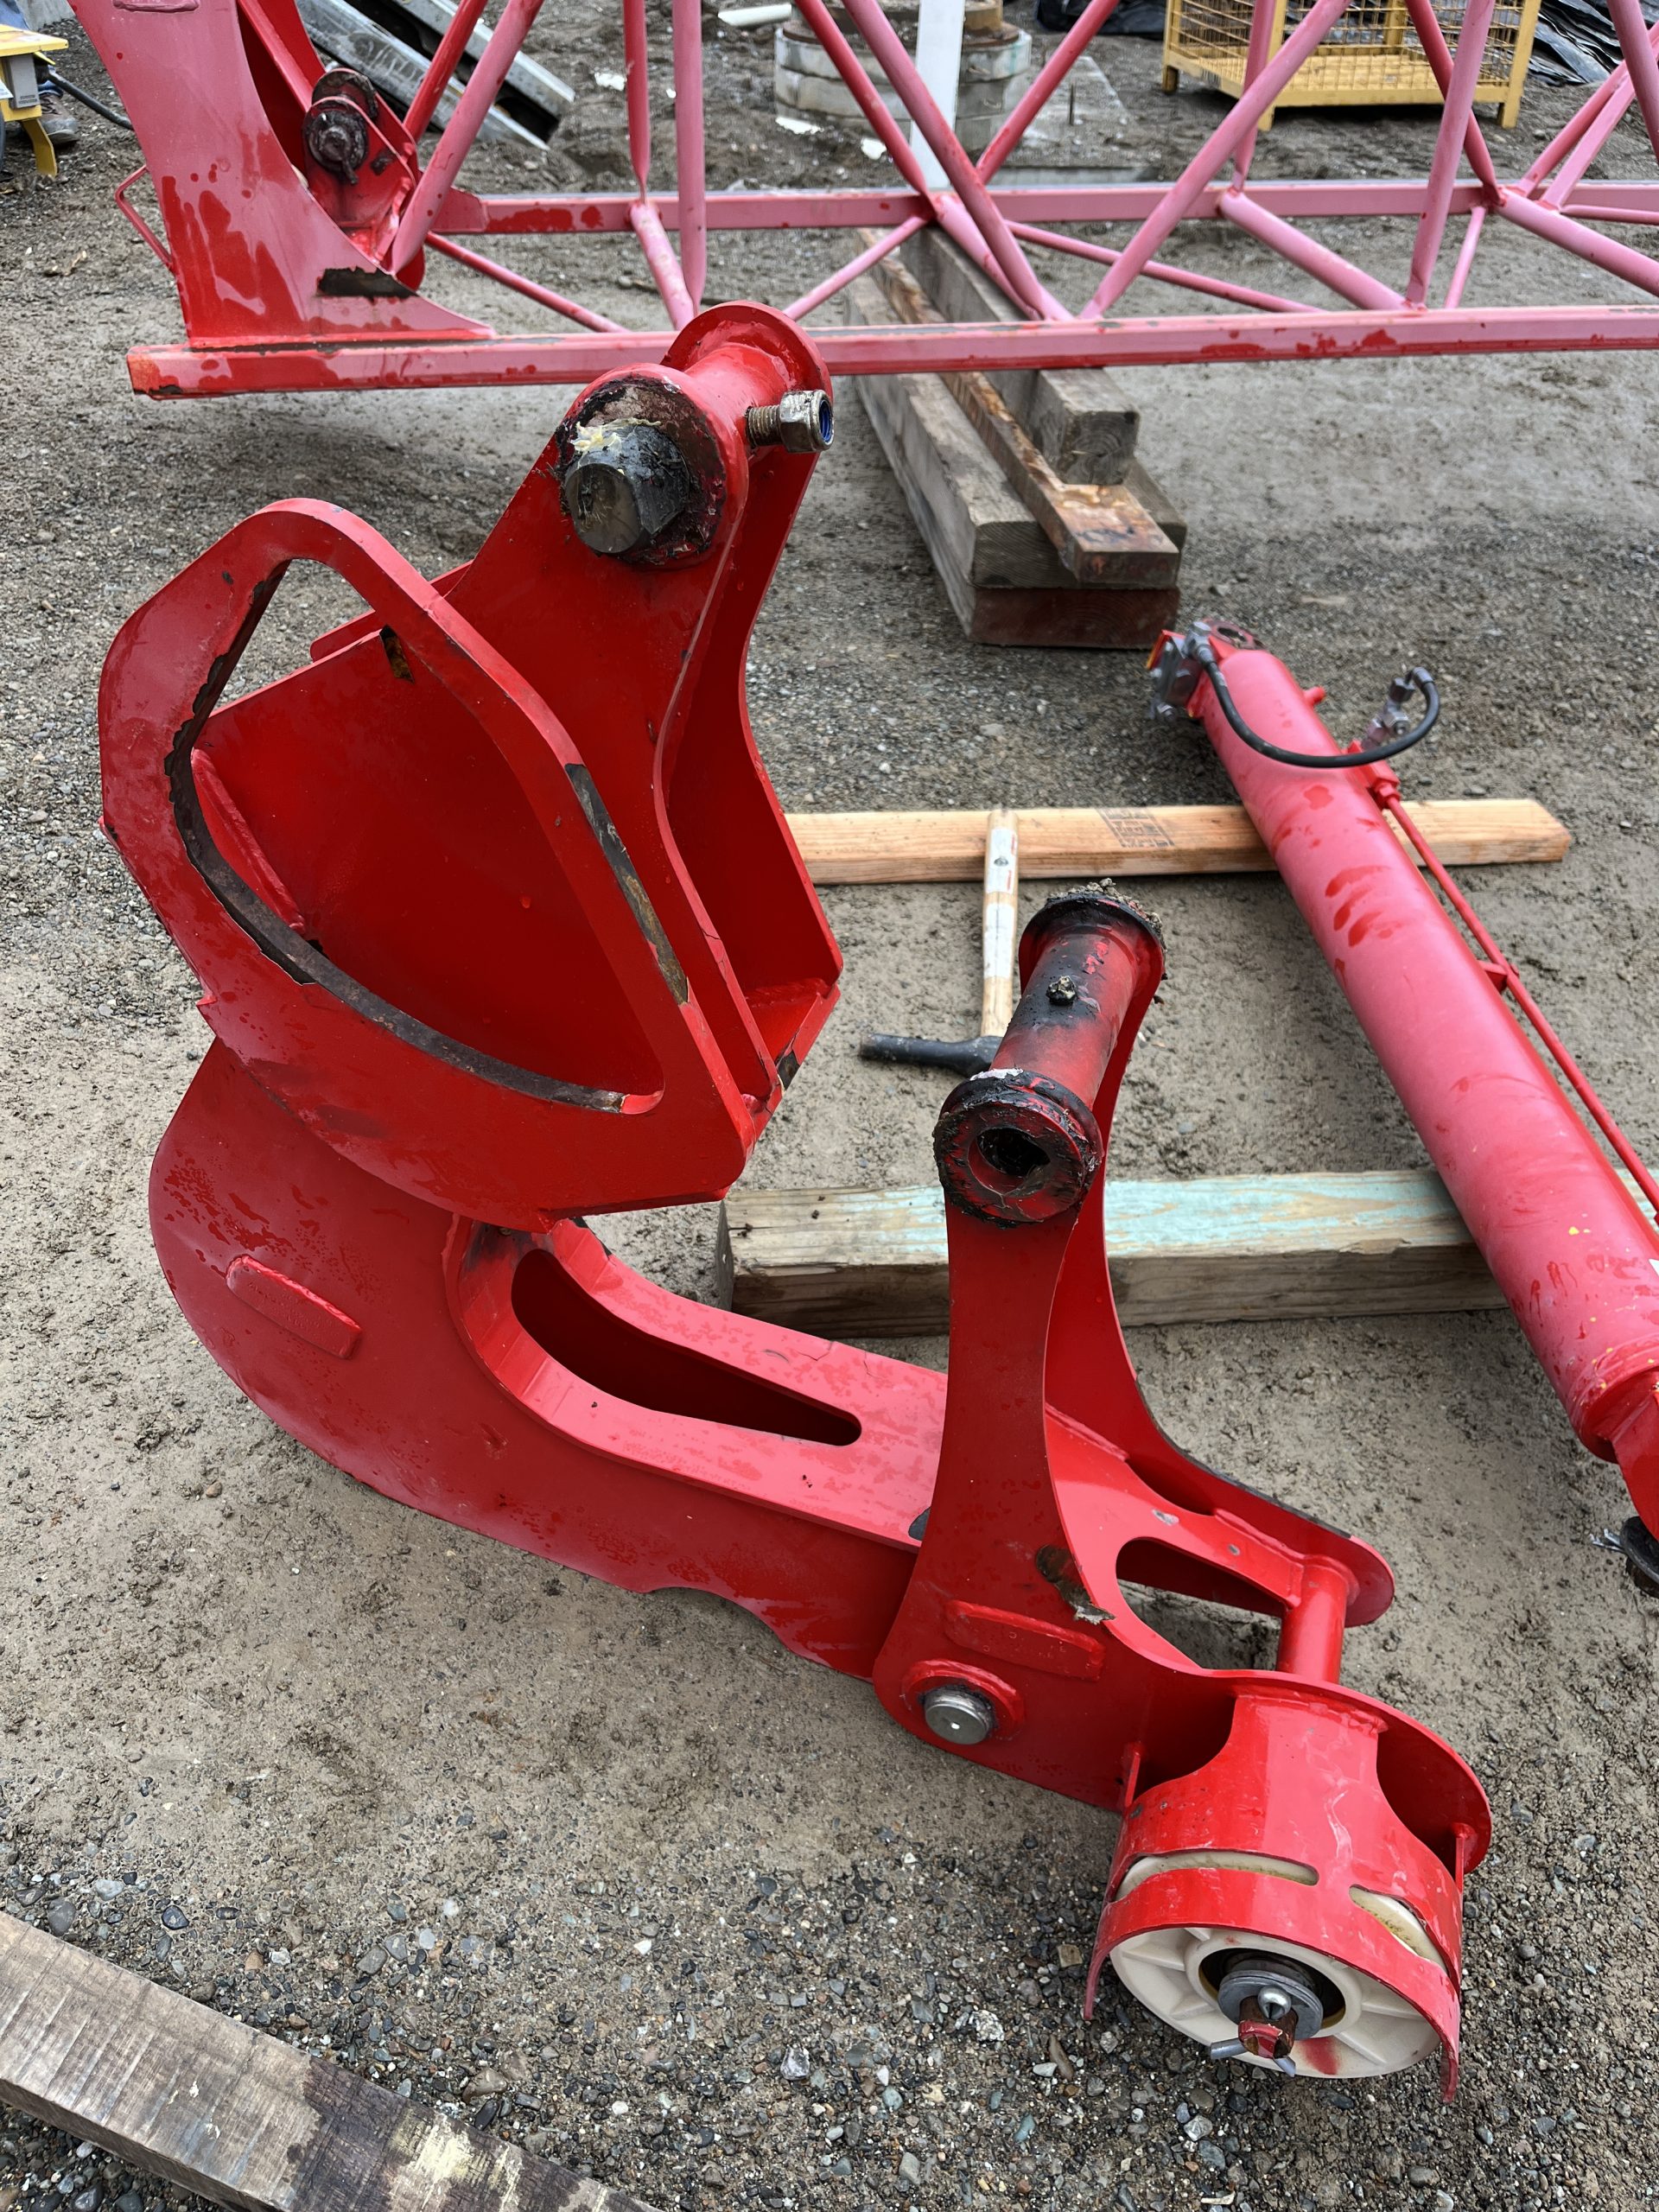
The connecting rod (4)(image below) pivots on a special pin with a through bolt. To remove the connecting rod (4) Remove the through bolt, slide out of the connecting rod pin (4) The sheave assembly that is detailed in the image below (1) is separate and will unpin without any interference from the Connecting rod (4)  

Jib hinge, Connecting rod, jib removal

The connecting rod pin fits into a slotted rail, the pin needs to be at the bottom of the rail and turned 1/4 turn to be removed. (Note the trolley cable sheave is installed and pined into place. The pin required to pin the sheave is the same pin used to hold the pulley holder (1) in place. There is some paint in the I.D. of the holes, it is recommended to install the pin first with anti-seize to help drive out the paint before installing the sheave. )

The connecting rod assembly can be removed without completely disassembling the assembly as detailed in the instructions.


U230X Processor not powering on.

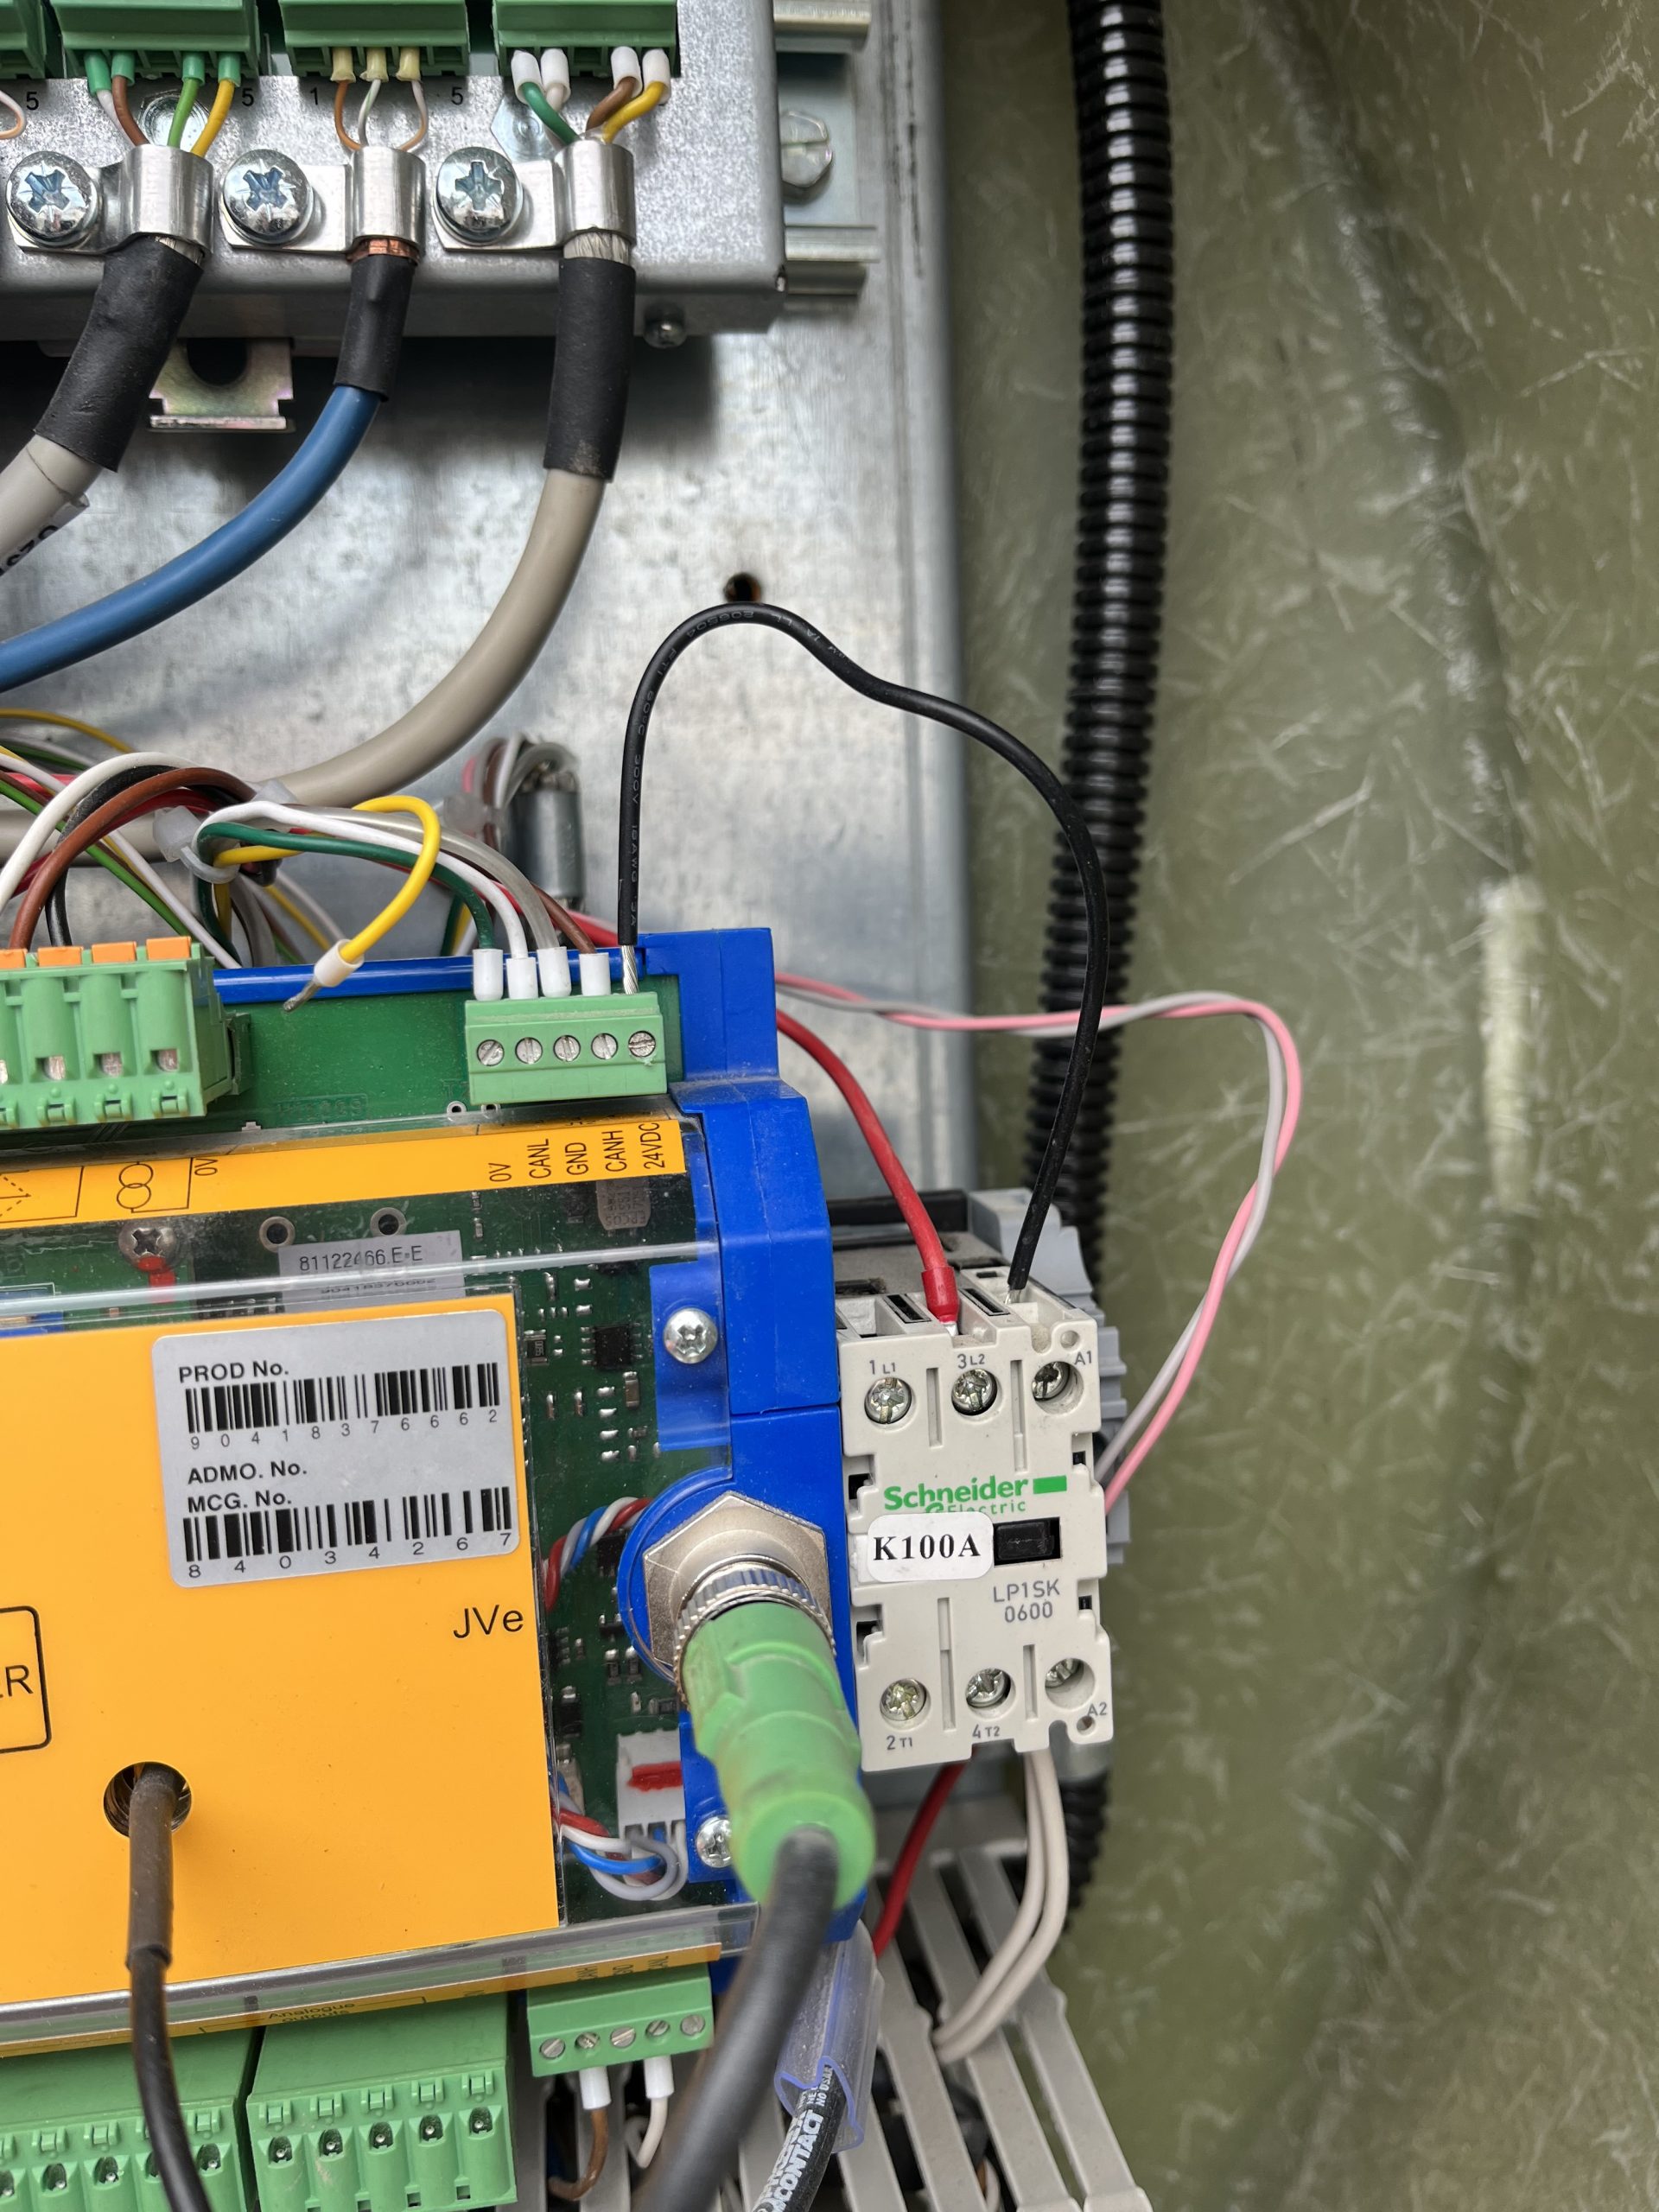
Customer complaint was that the crane would not connect to the remote. It was found the U230X Processor display wasn’t on, but the light shining on the processor was on. A voltage reading of 50V was taken at the J1/2 and continuity reading was taken at J1/1.  It was noted that K100A wasn’t energized. A voltage reading at J12/5 was taken and found a reading of 0Volts

The U230X has an internal fail safe that if there is something wrong with the start sequence it will not power on. In this instance all outgoing connections were removed until only the J1 Connection was left connected to the processor. The crane was powered on and the processor powered up showing information on the display. One by one each J connection was added until the processor would not power on. It was found that the J12 connection was the offending connection. The 24V connection at J12/5 was removed at the processor and and the crane processor powered on.  The crane was once again powered down and a continuity reading was taken from the J12/5 wire to each J12 connection. It was found that the J12/5 was making contact to the J12/1, J12/3, and chassis ground. The customer inspected the KK plug for a connection error and it was found the wiring to the KK plug was compromised internally. As a temporary fix to allow the operator to continue to work a jumper wire was ran from J12/5 to the A1 connection on the K100A. The crane operates as it should. Replacement of the KK plug wiring should be taken in this instance.


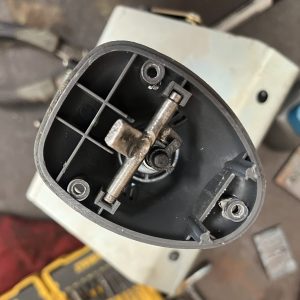
MRH deadman button not working

Operator complained the deadman button wasn’t releasing. 

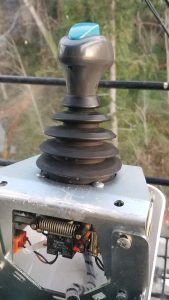
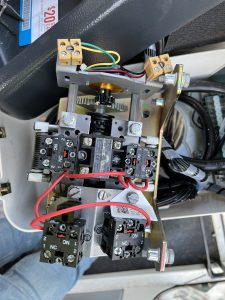
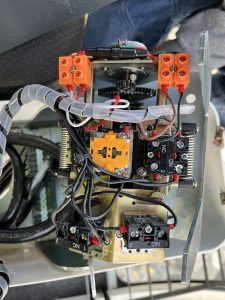
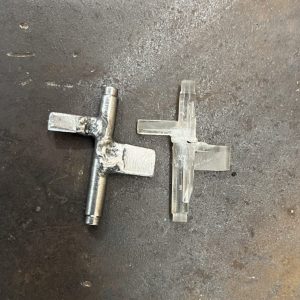
The bell crank that operates the deadman switch pin broke.  The temporary fix was to remove the top of the joystick and button and manually lift the deadman lock pin. When the technician was able to arrive on site a T85 joystick was used in place of the MRH joystick until replacement parts were made.  The Deadman contact is different from a T85 stick and so the contact switch needed to be swapped.

Potain has switched design on the replacement joysticks, so a new bell crank was made

and reinstalled into the old joystick and reinstalled into the crane.


Unlisted Technician Videos

This playlist is only accessed by having a direct link. Do not share this link with anyone outside of RMC

Technician library playlist

  1. Hup CAN control card install
  2. Liebherr working electrical panel
  3. Holder Tractor service reset
  4. ACS380 Drive warning reprogram
  5. High gain receiver dip switch programing –V3 Remote control
  6. Basics of AMCS
  7. How to remove contactor from Din rail
  8. Weathervane microswitch replacement
  9. How to manually change Liebherr I/O’s from the PLC


MDT – Tech Tip Videos

MDT Tech tip Playlist

Below is a library of videos. If you have a customer with one of these issues, send them the link to our Youtube channel to help free up your time.

LMI Fault Troubleshoot – Crane won’t start, how to access the fault stack Youtube Link

LMI service code – How to enter a service code using the LMI Youtube Link

Loss of cab power – Instructions to check for tripped circuit breaker Youtube Link

Turning off slew encoder – How to enter the VFD to turn off the slew encoder Youtube Link

Checking Correct Power and Phase – Where to look for the correct phase Youtube Link

Switching from 4 part to 2 Part – How to switch the hook block Youtube Link

Custom operator controls – How to change or adjust the operator controls Youtube Link

Emergency hoist release – How to lower a load without crane power Youtube Link

CCS Serial number lookup – How to lookup the serial # in the processor Youtube Link

Inputting a new serial number into CCS – How to input a new serial # into the processor Youtube Link

Manual weather vane – How to put Topless cranes into weather vane manually Youtube Link 

Wireless Remote Diagnostics – How to check the functionality of the wireless remote Youtube Link 

Weathervane detection microswitch replacement – How to locate and remove the weathervane detection microswitch. Youtube Link 

Hup – Tech Tip Videos

Hup – Tech Tip Playlist

Below is a library of videos. If you have a customer with one of these issues , send them the link to our Youtube channel to help free up your time.


Hup remote Functions – Remote button, switch and screen displays. Youtube Link

VFD Location and Error code – Location of VFD’s, Breaker locations, and Where to look for error codes. Youtube Link

Hup Handheld remote – How to plug in and start crane with wired handheld remote Youtube Link

Checking power – How to check voltage at the filter. Youtube link

Manual weather vane – How to manually engage weather vane and confirm it is in weather vane via the remote Youtube Link

Automatic weather vane – how to activate the weather vane with push button Youtube Link

Hoist block and trolley at end of shift – Where to place the trolley and hoist block to help when ice/snow accumulation develops Youtube Link

Fast Charge Battery – How to remove and install batteries Youtube Link

Taking out of weather vane – How to get into work mode and confirm you’re out of weathervane. Youtube Link

Daily inspections – Base Level, Power cable inspection, Wire rope inspection, Trolley inspection Youtube Link

Start instructions – How to start with a generator,  connect remote and confirm connection Youtube Link

Weathervane to working mode confirmation –  Hup with dual slew motors. Youtube Link

Wireless Remote Diagnostics – How to check the functionality of the wireless remote Youtube Link 


Igo T-70-T85-T130 Tech Tip Videos

Igo T70, T85, T130 Tech Tip Playlist

Below is a library of videos. If you have a customer with one of these issues , send them the link to our Youtube channel to help free up your time.

Manual weather vane – How to properly put the crane in to weather vane manually Youtube Link

VFD’s – Their location and where to look for error codes. Youtube Link

Twisted power cable – How to enter the processor to turn off limits and unwind the twisted power cable Youtube Link

Weather vane – How to put the crane into and out of weathervane Youtube Link

Cordless Remote Functions – Key location, Startup screen and address, Joystick functions, Estop, and the screen functions Youtube Link

Phase detection – Where to look to confirm phase is correct Youtube Link

Checking incoming power – Where to check for the correct power required to run the crane Youtube Link

Erection aid help –  How to access the processor to the erection aid screen Youtube Link

Maintenance screen – How to access the processor to the Maintenance  screen. Youtube Link

Corded Remote install – How to install the corded remote Youtube Link

Auto slew greaser location – Where to locate the auto greaser and how to refill Youtube Link

Turning off slew encoder – How to enter the VFD to turn off the slew encoder Youtube Link

LMI Fault Troubleshoot – Crane wont start, how to access the fault stack (cab mounted cranes) Youtube Link

LMI service code – How to enter a service code using the LMI(cab mounted cranes) Youtube Link

Loss of cab power – Instructions to check for tripped circuit breaker (cab mounted cranes) Youtube Link

Functioning electrical panel walkthrough – An overview of what is in the panel Youtube Link

Jib retaining pin issues – Location of the flipper switches, the validation button and winch pin. Youtube Link

Automatic weather vane – How to visually tell you are in weather vane Youtube Link

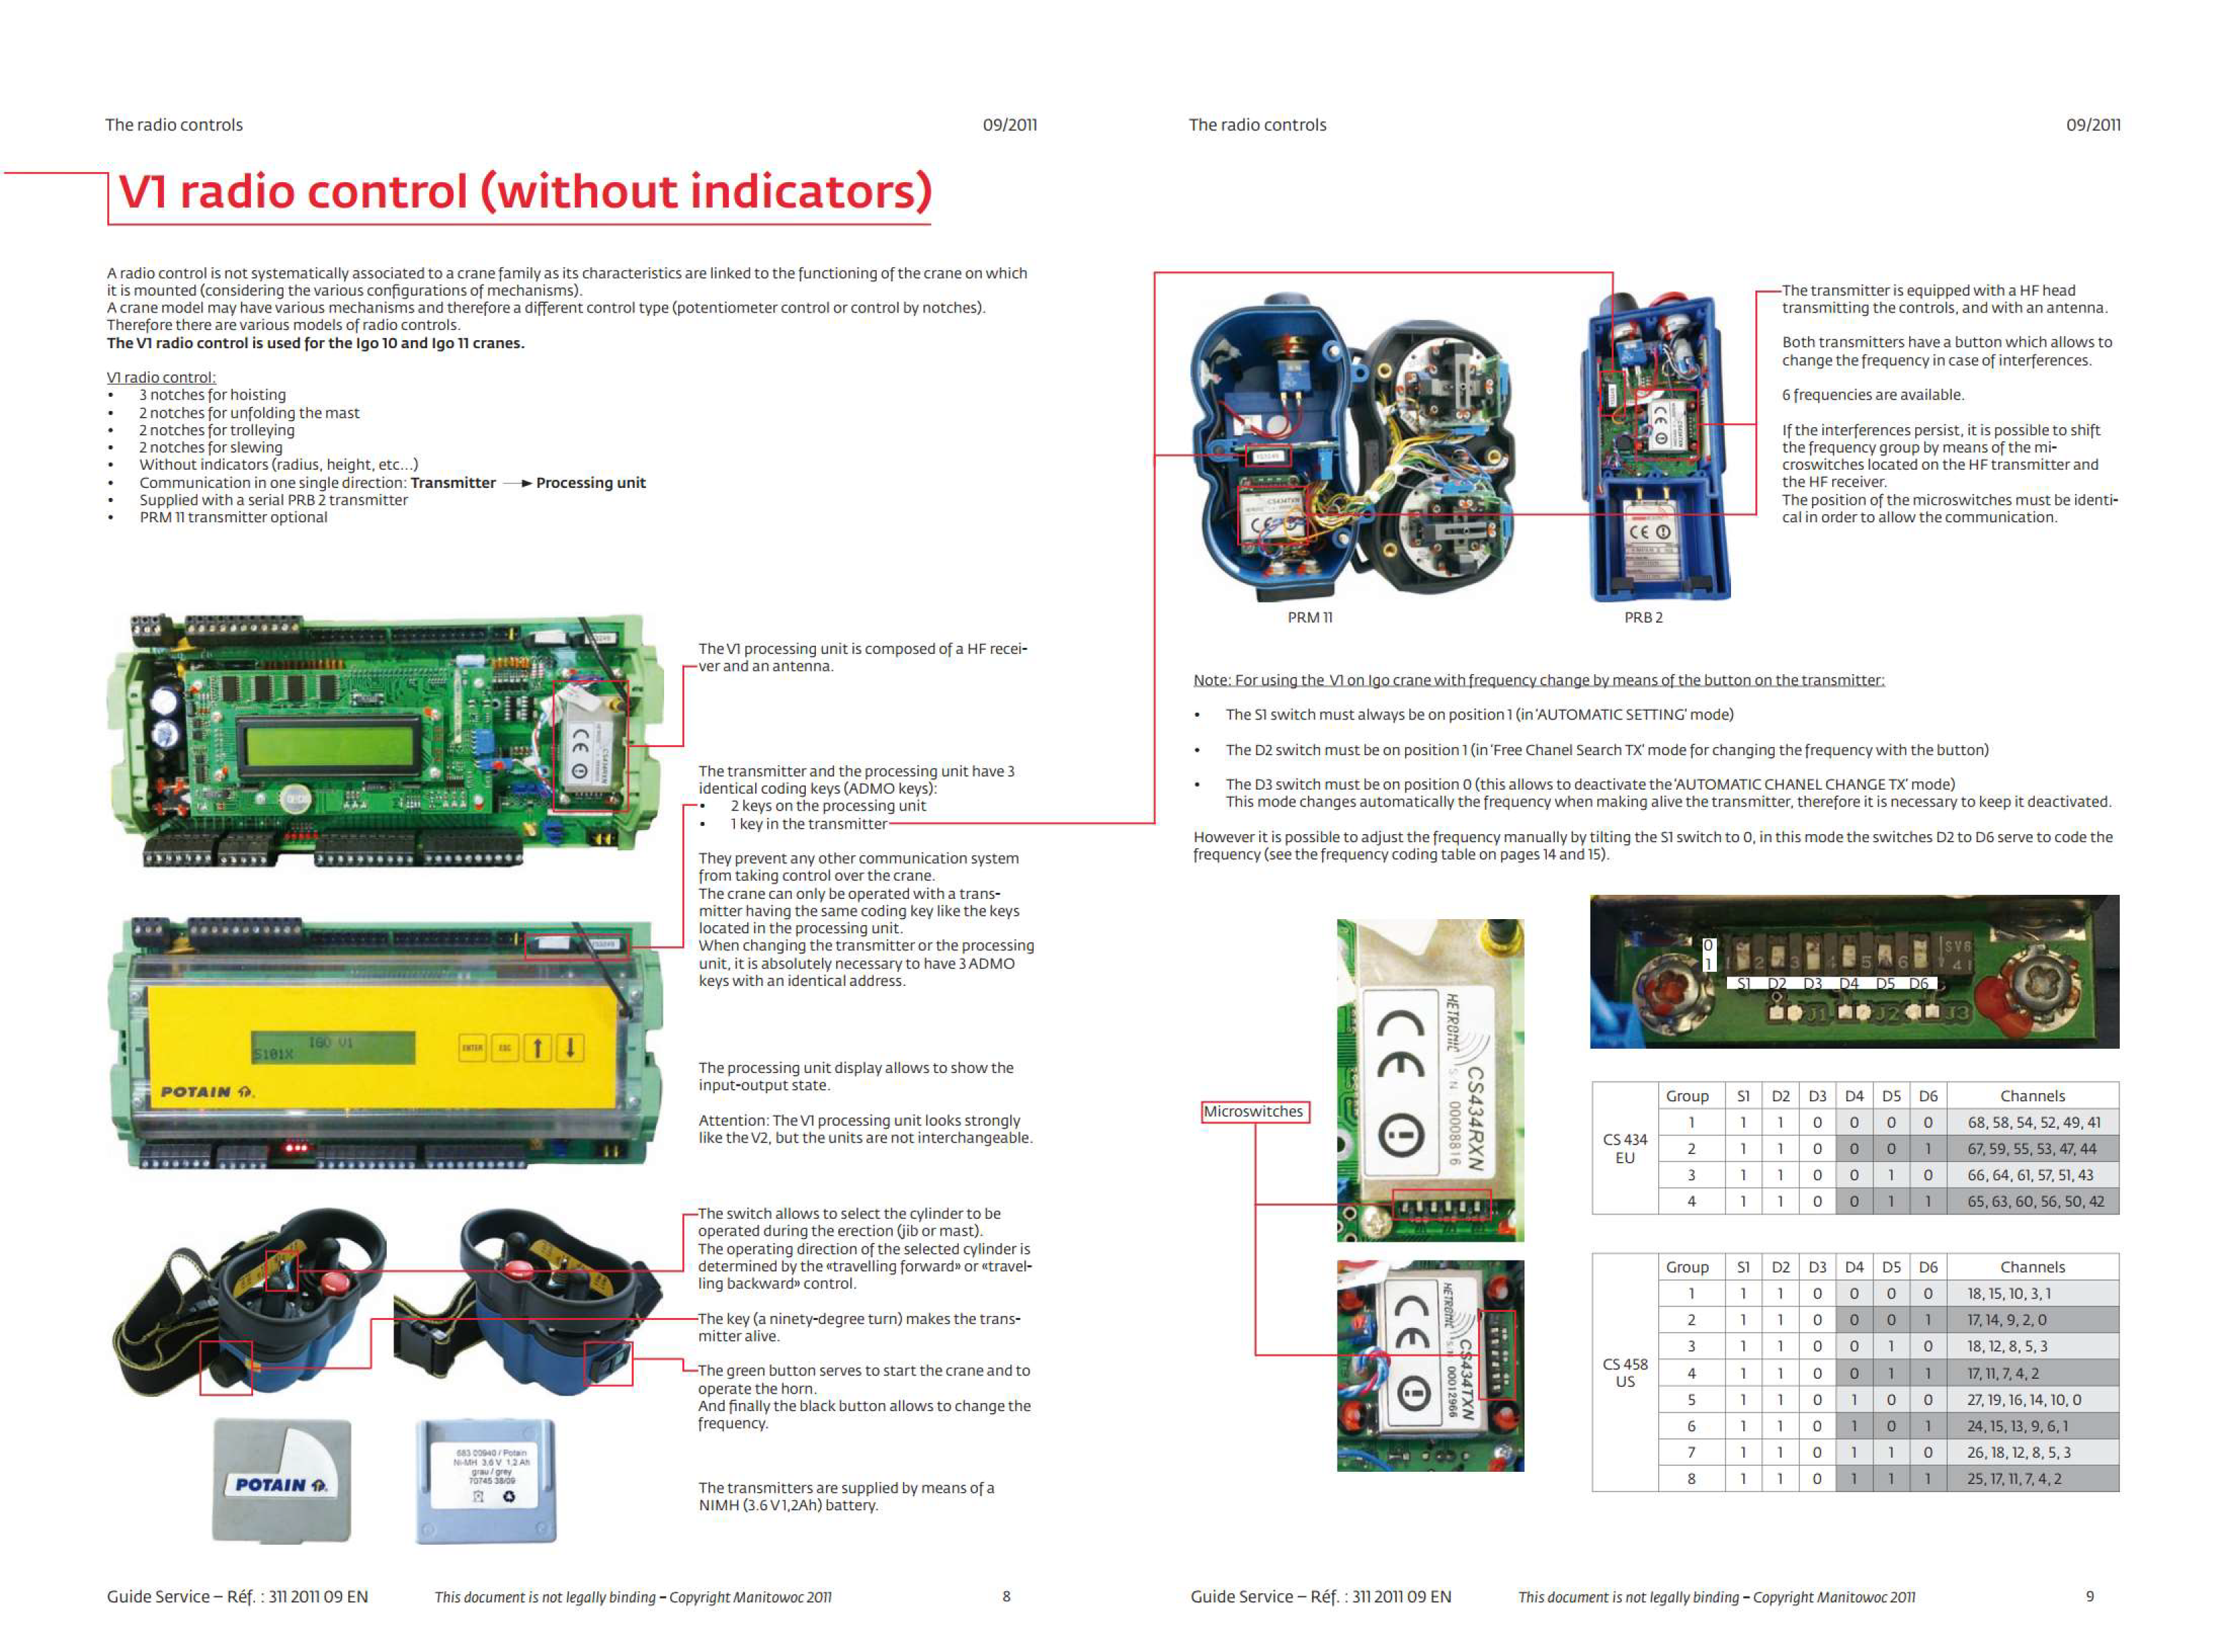
Remote Address and Frequency group – how to access the processor for the remote address and frequency group Youtube link

Active relays and switches – Which relays and switches are active on a working crane Youtube Link

Processor receiver inputs – How to access to processor for the inputs Youtube Link

Reading windspeed from the processor – How to access the processor to read windspeed Youtube Link

Jib retaining pin screw cleaning – The procedure to cleaning the threads Youtube link

Trolley Error – When the panel Light burns out, the trolley starts to error out Youtube link

Memory card replacement – How to replace the memory card on the slew drive. Youtube Link

Weathervane to working mode confirmation –  Newer model T85 Youtube Link

Major Electrical Components – A description of the major electrical components in the panel of a T85 Youtube link

 Jib Position Switch – Use loses hoist function- this may be the jib position switch has been changed Youtube Link

Wireless Remote Diagnostics – How to check the functionality of the wireless remote Youtube Link