Pages from Manual for setting up Top Tracing 2
Pages for advanced zoning is in TOP TRACING SYSTEM and starts on page 56
Igo T85A has 12 teeth on pinion and 162 teeth on slew ring

Rocky Mountain Crane Service Logs
Pages from Manual for setting up Top Tracing 2
Pages for advanced zoning is in TOP TRACING SYSTEM and starts on page 56
Igo T85A has 12 teeth on pinion and 162 teeth on slew ring
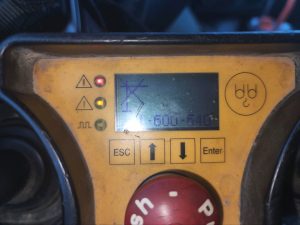
Translation under smiley face is
When the transmitter is turned on if you simultaneously press ENT and ESC all the passwords appear.

Igo T70, T85, T130 Tech Tip Playlist
Below is a library of videos. If you have a customer with one of these issues , send them the link to our Youtube channel to help free up your time.
Manual weather vane – How to properly put the crane in to weather vane manually Youtube Link
VFD’s – Their location and where to look for error codes. Youtube Link
Twisted power cable – How to enter the processor to turn off limits and unwind the twisted power cable Youtube Link
Weather vane – How to put the crane into and out of weathervane Youtube Link
Cordless Remote Functions – Key location, Startup screen and address, Joystick functions, Estop, and the screen functions Youtube Link
Phase detection – Where to look to confirm phase is correct Youtube Link
Checking incoming power – Where to check for the correct power required to run the crane Youtube Link
Erection aid help – How to access the processor to the erection aid screen Youtube Link
Maintenance screen – How to access the processor to the Maintenance screen. Youtube Link
Corded Remote install – How to install the corded remote Youtube Link
Auto slew greaser location – Where to locate the auto greaser and how to refill Youtube Link
Turning off slew encoder – How to enter the VFD to turn off the slew encoder Youtube Link
LMI Fault Troubleshoot – Crane wont start, how to access the fault stack (cab mounted cranes) Youtube Link
LMI service code – How to enter a service code using the LMI(cab mounted cranes) Youtube Link
Loss of cab power – Instructions to check for tripped circuit breaker (cab mounted cranes) Youtube Link
Functioning electrical panel walkthrough – An overview of what is in the panel Youtube Link
Jib retaining pin issues – Location of the flipper switches, the validation button and winch pin. Youtube Link
Automatic weather vane – How to visually tell you are in weather vane Youtube Link
Remote Address and Frequency group – how to access the processor for the remote address and frequency group Youtube link
Active relays and switches – Which relays and switches are active on a working crane Youtube Link
Processor receiver inputs – How to access to processor for the inputs Youtube Link
Reading windspeed from the processor – How to access the processor to read windspeed Youtube Link
Jib retaining pin screw cleaning – The procedure to cleaning the threads Youtube link
Trolley Error – When the panel Light burns out, the trolley starts to error out Youtube link
Memory card replacement – How to replace the memory card on the slew drive. Youtube Link
Weathervane to working mode confirmation – Newer model T85 Youtube Link
Major Electrical Components – A description of the major electrical components in the panel of a T85 Youtube link
Jib Position Switch – Use loses hoist function- this may be the jib position switch has been changed Youtube Link
Wireless Remote Diagnostics – How to check the functionality of the wireless remote Youtube Link
TA19-149-A – ACS880 SLEWING CONVERTER MESSAGE AFE1 AFEB (OFF2) FIP CARD_EN
Bypass FIPO card per bulletin
If adding shunt, add to Blue 5 Pin connector at terminals #3 and #5
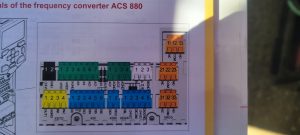
Upon start up, crane will not swing, and remote displays 1-600-640. That code is not in the manual. We need the code off the slew drive itself. 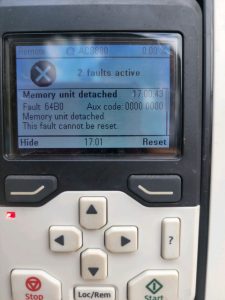

Removed cover and memory stick, and reinstalled memory stick. Crane started and all functions are working.
Potentiometer values (pions) should decrease as the trolley moves in and block goes down.
Range
Trolley 650 – 3500
Hoist 750 – 3500
What lengths to have slings for picking T85
Two of the chain slings need to be 5′ 10″ shorter
Longer slings go on the counterweight end of the crane
chain slings
slings
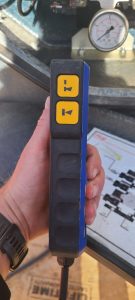
The top button is the start button (line with horn icon)
The bottom button is the horn only

The top button is the swing brake
The bottom button is the rope reeving change button

The toggle switch is for erection and work mode (to the left is jib, right is mast, center is work)
The red button is the emergency stop (its spring loaded and should pop back up after being pushed)
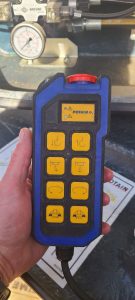
Top series of buttons is hoist
2nd from the top is trolley
3rd is swing
4th is travel
Change the parameter in the slew drive to warning instead of fault.